Adhering the rubylith to the screen.
I thought I’d be happily printing tote bags with my homemade printing screen today. Alas, I am not, but all is not lost. When things don’t work out as you plan, you can either drop it, or work it out, and I’ve made both decisions plenty of times in my years of creating things, both as a fine artist and a crafter. If I’m creating something for sale and my idea turns out to be too complicated or expensive, I have no problem letting it go, or just using the technique as something I might make for someone as a gift, but not for sale. But sometimes making mistakes and working things out gives you a greater understanding of a material or process, and even your self, and it’s worth the time to keep going. And learning new things is what keeps it all fresh.
And sometimes I’ll share this part of the creative process as well as sharing the things I’ve made so it doesn’t all seem like magic.
In this case I learned more about the technique I tried to use, and I also found a company who can make screens for me from my designs for the ones that don’t work well with my technique. It’s a little expensive to have the screens made, but until I work out things with my homemade technique I’m more than happy to send my designs over to them.
Ailurobibliophile

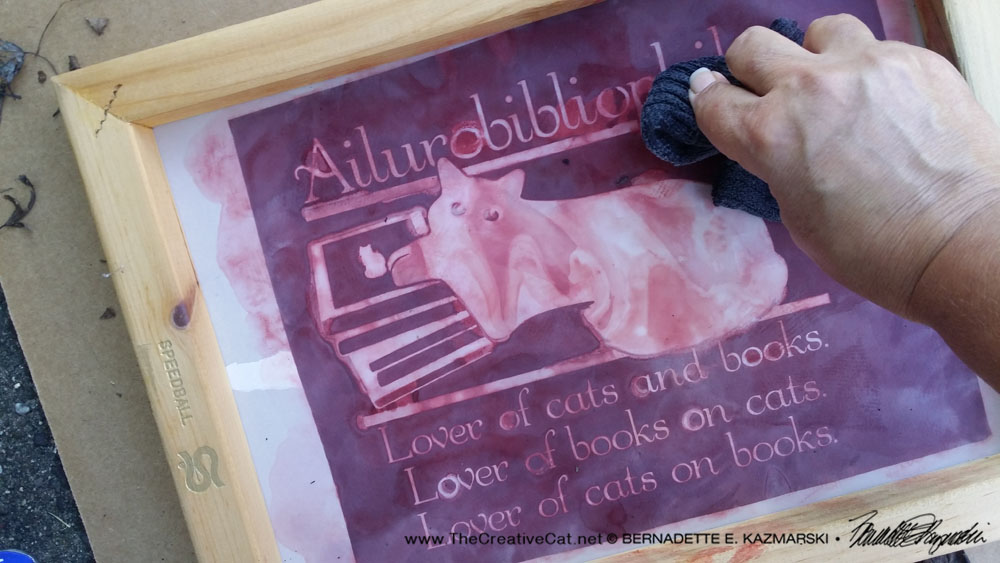
Ailurobibliophile bag closeup.
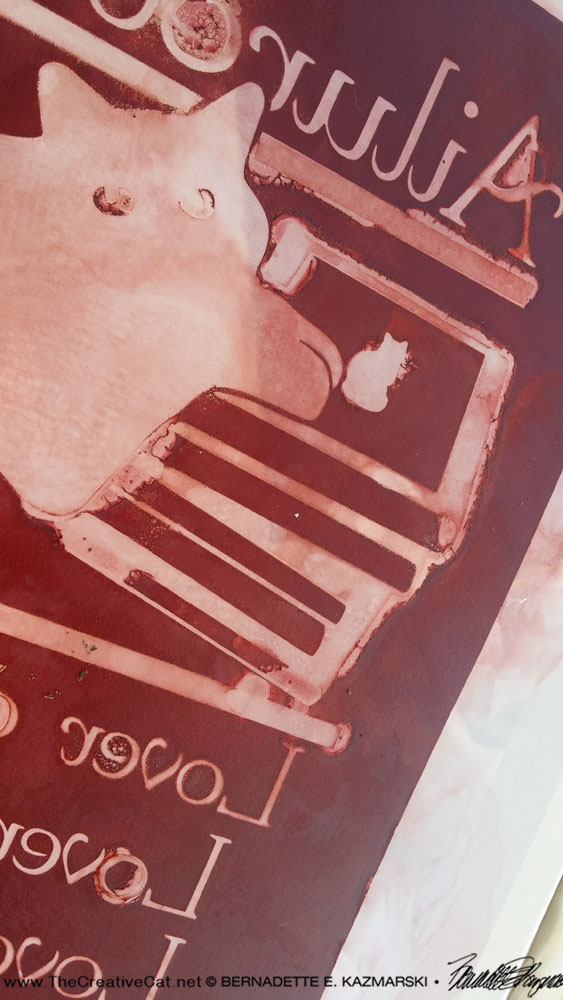
When my stencil didn’t work for my “Ailurobibliophile” design I vowed to start screen printing.
Making my own screens has a big hurdle of expense and storage/work space with chemicals and lights and so on, and I know I just can’t invest in that right now, nor do I have the space in this little house. That just meant I had to find a way to make a screen with the means I had.
Checking around with screen printers I work with as a graphic designer I found it really wasn’t reasonable for them to make a screen and sell it to me, for various reasons which I could accept. Just like all other printing processes, commercial screen printing is not like it used to be.
So I went off to another idea: using a product called Rubylith to make a “positive” image, then adhering that to a screen. I’d done it years ago in college, and looked it up again to find the details.

What it looks like when all the rubylith is adhered.
If you’ve ever worked in production for graphic arts, especially 30 or more years ago, you’ll be familiar with Rubylith, a thin transparent red film on a sheet of sturdy clear acetate. You can lightly cut through the ruby layer and peel away an area from the acetate and leave an area in place, depending on your purpose. In production art on paper and boards before modern color separating it was used as an overlay to create a solid color fill, leaving the red film in place to create the printing plate for that color.
For screen printing, I would use the ruby section as the background, blocking the flow of ink onto the surface. I would adhere the ruby layer to the stretched screen for to be used for printing and peel away the clear acetate backing. The ruby section would block ink while the clear sections would let ink through to print on the tote bag or shirt or paper or whatever.
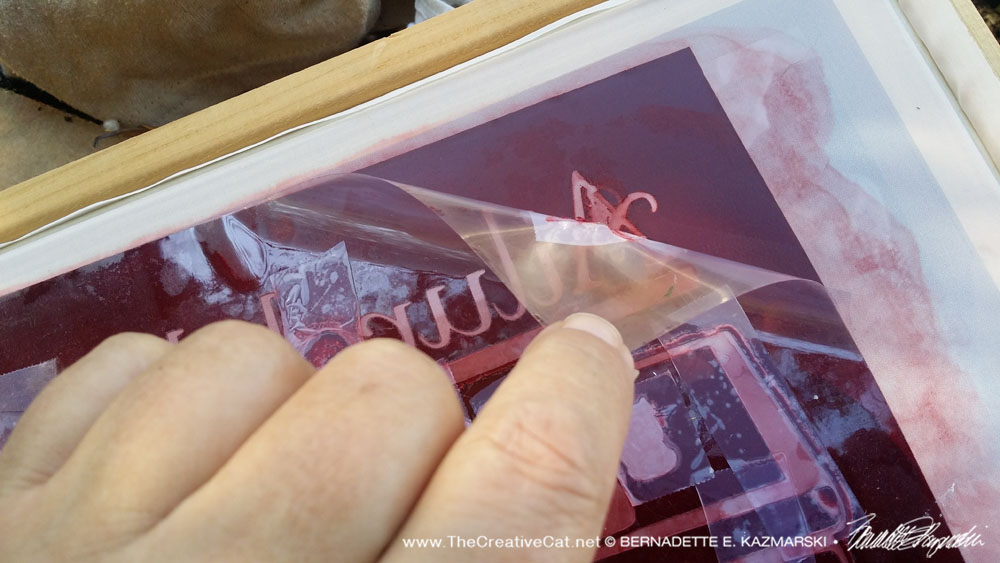
Peeling off the acetate backing.
After I thought I had some Rubylith leftover from the olden days, I went looking and had a little trouble finding it in a reasonable amount. I called my favorite local art supply store, Artist & Craftsman Supply, because they have all sorts of things you don’t find anywhere else. They did not have it, but others had also asked for Rubylith, so they would order it and let me know when it was in. Ah, the friendly and knowledgeable service you get from a local business, even if they are one in a chain of stores.
I have more than Ailurobibliophile to print, so it was worth it to head over to the store and purchase supplies for several projects and portraits. They were so helpful in choosing the right materials and in techniques, and I promised I’d report back on this one.
Last night I prepared my Rubylith and encountered an issue that turned out to be more of an issue later. My cutter was set to only cut through the top layer of color and not through the acetate, and yet it did cut through the acetate in more than half the design. I have the settings on the shortest blade and slowest cutting. This meant the centers of closed letters fell out of place, and other areas were partially cut through and others not. I used clear tape on the back of the acetate to hold it together where it had been cut, and replaced all the letter parts that had fallen out, then pulled out all the material where I wanted the design to print in black.
It worked right away!
Today I got my screen, cut Rubylith, lacquer thinner and a bunch of old socks to use as rags and went outside to work in the shade on the sidewalk. Lacquer thinner is volatile and I won’t even store it inside, nor do I want the fumes to even drift indoors. The technique of dissolving the ruby onto the screen was apparent right away as I could see it had fully adhered to the screen wherever I pressed the sock drenched with lacquer thinner. The article I’d read said not to rub it, and I would be able to tell it had adhered because of the color change.
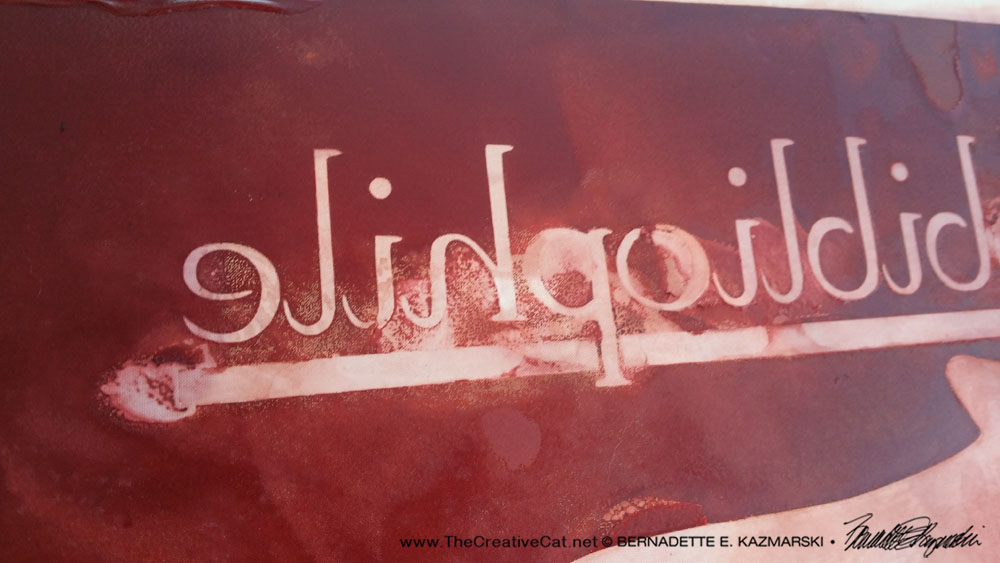
I had used pieces of tape behind the “o” and “p” as well as the horizontal lines.
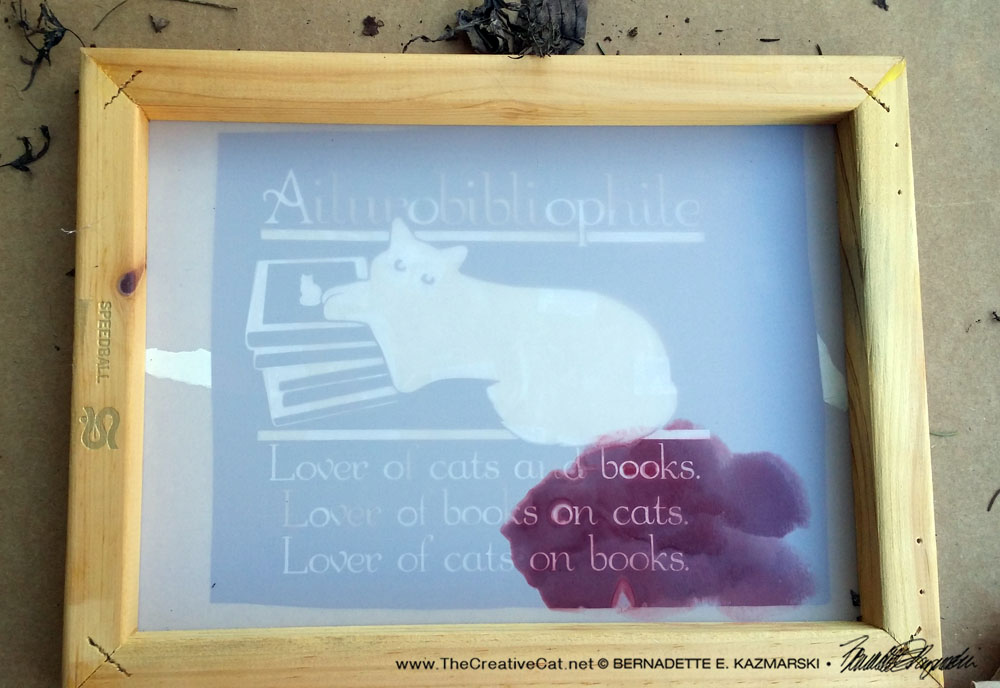
But I could also see that in places where I’d had to tape the design to hold it together, even though the tape was on the side facing away from the screen, changed the way the ruby reacted and I got blurred edges and even missing shapes. Wherever you see blurred edges, below, there is tape on the back. But look how clear the other letters are, and Basil’s paws!
All those book edges were cut through with tape on the back.
I immediately tried scrubbing it out of the screen, to no avail.
I went in the house and looked up a small independent screen printer that artists used to use to make screens and print for them, and there was my solution. Wish I’d thought of them earlier! I will get that screen on Thursday and can begin printing the totes and other things then.
However, now that I’ve done this once I have a few ideas on how I might cut and adhere better, so I’m going to play around with the second idea. If that’s successful, you’ll see it Friday or Saturday.
Wish me luck!
Preorder your tote bag
In the meantime, you can preorder the Ailurobibliophile tote bag.
Other items with the same art or design To find all items on this site with the same art or design, use the search box for the name of the artwork and you'll find all that's available.
![]()
![]() Don’t miss any new items or opportunities!
Don’t miss any new items or opportunities!
“Follow” the Portraits of Animals blog with the link in the upper left. Sign up to receive posts in email, or in your favorite reader using the links in the right-hand column.
Sign up for e-newsletters
You can also sign up for my monthly e-newsletters to receive special discounts and find out where I’ll be with my artwork.
Click here for the Creative Cat Preview E-newsletter, for feline and animal-specific products and information.
Click here for the Art & Merchandise E-newsletter, for landscapes, nature, urban scenes and more.
For art, photos and writing as I develop it, visit my blogs.
See feline art and photos as they happen on The Creative Cat, along with feline news, health, welfare, rescue stories and more.
See daily photos as I post them on Today.
Read poetry, short stories, essays and more on Paths I Have Walked.
. . . . . . .
© 2022 | www.PortraitsOfAnimals.net | Published by Bernadette E. Kazmarski
All images used on this site are copyrighted to Bernadette E. Kazmarski unless otherwise noted and may not be used without my written permission. Please ask if you are interested in using one in a print or internet publication. If you are interested in purchasing a print of this image or a product including this image, check to see if I have it available already. If you don’t find it there, visit “purchasing” for availability and terms.