
Even with a good photo, I usually request a few extra photos to make sure I can clearly see markings and coloring, and if possible, I like to meet my subjects so that I can get to know their personalities and snap a few more photos.
Following is a demonstration of just how it’s done, showing my process for both a multiple cat portrait and a single dog portrait.
Ripley, Murphy, O.G., Veda and Missy Kitty
The process is different for each portrait depending on what’s needed. This portrait needed just about all the tricks I have in my little bag! I had the opportunity to visit their home and meet each one of them, and so spent about two hours following them around and photographing them in their habitat and with their habits, and talking to their mom about each one of them. Being able to photograph them myself gives me the best visual information–after all, would you photograph just your cat’s tail anticipating that someday you might need that photograph? I do. Their mom adopted each of them individually either from shelters or from rescue missions, so each had a story that added to what I gathered about their personalities. We talked about where the portrait might be hung to help determine size and certain elements of the design, but she left the details up to me.
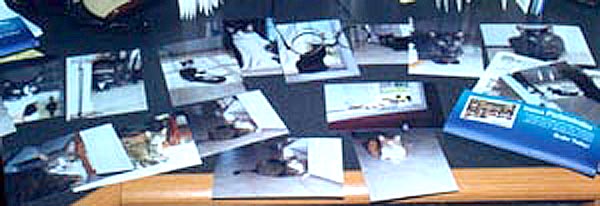
Preparing for the portrait.
Depending on the complexity of the portrait and how many photographs I have to combine to get the scene, I may simply begin the drawing with no preliminaries or will create a pencil sketch to size. However, it’s a rarity that I don’t combine fewer than three pictures, and for this one I lost count of the number of pictures I combined. Thanks to the miracle of modern electronic methods, I can now go to my computer, scan the photos, and, using the same software I use to manipulate photos and artwork for my graphic arts, crop, resize, combine and retouch each subject, then combine them into a final finished composite.
This, of course, means I have to make up shadows and highlights and the lay of the fur when I get down to the final drawing. When designing the posture and setting, I try to place the subjects against a background area which will complement their looks, and in combining multiples like this, I try to pair together animals which are friendly with each other and keep the enemies far apart.
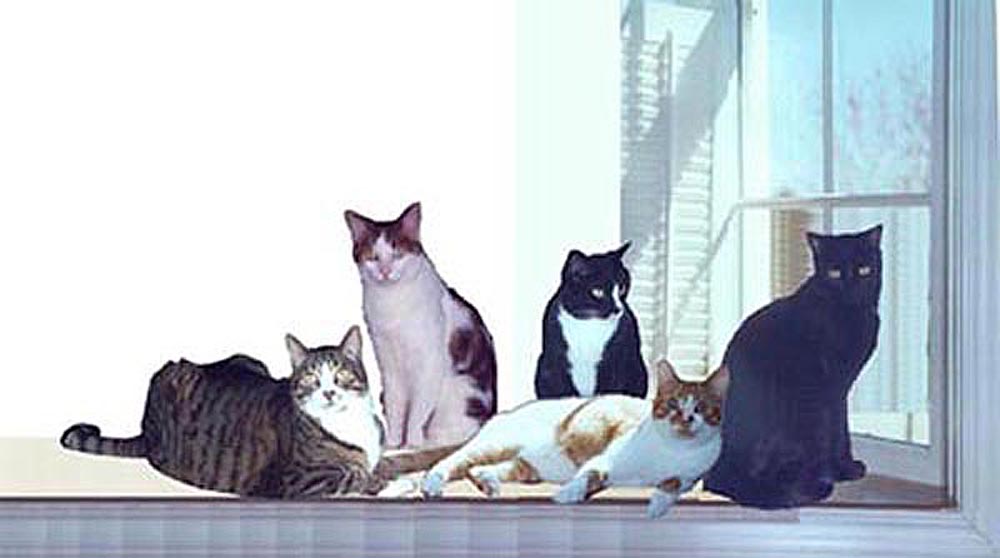
The composite in Photoshop.
For this portrait, I created two composites which I liked equally, and so did my client, but in the end the spot over the fireplace made the decision for the long narrow format. Each of the subjects is a composite of at least two photographs for face, paws, tail, eyes, ears, etc. I had an idea to make a bay window with windowseat for them all because the light was so beautiful and each of them visited this spot regularly. I then combined each of the individual composites, added the window in the background, and sent it off to my client for approval. When I began work, I enlarged the composite to the actual size of the finished drawing, printed it out, covered the back with a dark shade of pastel, and transferred it onto my drawing paper, which is an archival quality, 600-grit sanded paper.

On my easel.
After generally filling in the actual colors in the drawing and checking to make sure that everything was in proportion and in proper perspective, I was ready to work the actual drawing at my easel, with all the reference photos near. I usually work the background first, then work one subject at a time, keeping the whole work at about the same level of detail. I may go over a portrait three or four times this way, each time working more color and detail into the work. In this case, because the window is a large portion of the work, I wanted to make certain all the structure and detail of it wouldn’t compete with the subjects, so I left it with less detail and color than the subjects and the surface they’re resting on.


The final pass adds the highlights in the fur, the whiskers and the sparkles in the eyes. When they look back at me from the drawing, I know it’s done. But it’s not really done until my client reviews it to make sure I’ve gotten everything right–after all, they are your companions, and I’d be just as fussy about mine. In this case, Veda was just not right–she’s a very tiny, slender cat, but shy, and the only clear picture I had gotten of her was of her hunched up a little scared under a table. Even though the image was accurate, it just wasn’t Veda, so my client sent me a few more photos of just her and I reworked that area. Since I had to slim her down and make her a little taller, and Veda is primarily black against a pale background, I had to actually lift quite a bit of pastel off of the paper and start over in some areas. If you compare the finished portrait at the beginning of this article with the sketch directly above, you’ll see the difference in Veda’s image. At left is a detail of Ripley and Murphy.
The Finished Portrait

Chelsea
 Chelsea was a challenge because she was an “emergency portrait” as I call them–the recipient’s birthday was about a month away and it was to be a surprise. He had mentioned that he’d like me to do a portrait of his dog, so the whole family went together to commission me and conspired to keep the deal a secret. Lucky for me I know them pretty well, and could amble over there with my camera for a visit and to take pictures “for whenever you might decide what you want for Chelsea’s portrait”. He had originally wanted another pose for Chelsea, but the chances of finding that picture in time were slim to none. I took my photos, plus some others gathered from the family, and, as above, created a composite on my computer. Not knowing exactly what to do for the background, I was just going to add a complementary color, but since he often walked Chelsea in a park, the outdoor setting was suggested and worked out just fine. I relied on the many landscapes I’ve rendered for that, and fabricated it to suit the portrait.
 The other challenge of Chelsea was her face–she has unique folded ears, oval eyes and a muzzle that is not quite Lab. Unfortunately, I didn’t have any pictures of these details in the positions I needed for them to be, and so first came up with this position for her head and face. This is quite typical of her–looking off into the distance with alertness and curiousity–and the rest of the family really liked it, but we all knew that Chelsea’s dad would rather she be looking right at him. And then there’s the matter of the mouth. Most dogs hang their tongue most of the time, even just a little, and if they are portrayed with their mouth completely closed, they look much too serious and stiff.
 I had scant materials to work with in order to turn her head, focus her eyes directly at the viewer and open her mouth, but knew that this was what I wanted to accomplish. If my subject is a full-breed animal, I can often find enough materials in books and literature on the breed to use for details like this, but Chelsea has a little too many breeds to be able to use this. But having been able to meet her and gathering the visual details just from observation, I slowly worked these changes into her face. My creative license passed the test: in the end everyone was pleased that this was the dog they had grown up with, and her dad was happy to have her image, especially since she’s getting older and with a few health problems. Not to mention his surprise that everyone had managed to keep it a secret!
The Finished Portrait
